Article submitted by Courtney Mollins-Bidlake, RYT500, P-RYT
Hanumanasana is my favourite asana for a couple of reasons.
Firstly, I never considered myself “flexible” and certainly not able to do the “splits”. However, once I took the ego out of my practice, met myself/body where I was at (instead of where I thought I should be OR wanted to be), and used some props I discovered a new favourite pose! I felt so flexible and frankly like a badass! Secondly, and for me, the best part of this pose-its origin story. Hanuman is considered as the complete embodiment of Bhakti Yoga. Picture Hanuman leaping across the ocean to Lanka to save Sita (Rama’s main squeeze), all out of pure love for Rama! Ahhh, I love it! Dr. Raj Balkaran shares the wisdom behind the poses in his book “The Stories Behind the Poses”. How lucky are we to be able to join him to learn this and other stories at the SOYA Annual Retreat in Sorrento this June!
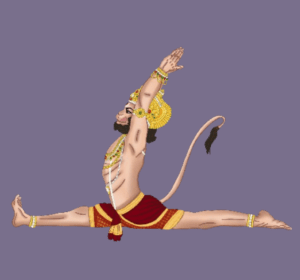
Illustration of Hanumanasana by Devika Menon, from the book “Stories Behind the Poses”.
Modifications:
- anjaneyasana (low lunge)
- ardha hanumanasana
- supta padangustasana (great if there knee or hip issues) See how to below!
Props:
- blankets folded or rolled for under knees or sit bones
- blocks for under hands and sit bones
- strap for reclined modification
- bolster for under sit bones
Benefits, Precautions, Modifications and Props for Hanumanasana
Benefits:
- opens hamstrings (front leg)
- opens quads (back leg)
- lengthens psoas (back leg)
- works extension and flexion of the hips
- spinal extension in full expression of the pose
- tones back and abdominals
Contraindications:
- hip replacement
- hamstring injury
- groin injury
- hip joint issues
- pregnancy-mobility into and out of the pose in late pregnancy may be challenging
- knee issues (ardha hanumanasana)
Getting into the pose:
Reclined Splits Variation: (supta padangustasana)
*You may need a strap
Laying on your back with knees bent, feet on the floor. Draw your right knee into your chest (have your strap handy if you think it will create the space you require to access this variation), reach the right hand along the inside of the right leg to the ankle, inside (medial) arch of the foot or the outside of the foot (this is where the strap can create more space, if needed). From this half happy baby position, you may choose to straighten the left leg or keep the left knee bent, foot on the floor. Hold for a few slow breaths and repeat on the left side. Once you have completed both sides, I like to do knee drops/windshield wipers from side to side or hug both knees into the chest for a release. You may choose to do this between sides as well.


Ardha Hanumanasana/Hanumanasana:
*have two blocks handy cork or foam will work (I like cork for more stability, but the foam are more forgiving on wrist joints or sitz bones)
From table top have a block on the highest setting (you can adjust this to suit your needs or get rid of the blocks all together) under each hand. Walk both hands (with blocks) to the left. Step your right foot forward and walk both hands/blocks back to the right. If accessible, have the right hand on the outside of the right foot/leg, coming into a low lunge/anjaneyasana. From here, start to inch your right foot/leg forward and walk the hands along with you. Eventually your leg may work its way to straight (but maybe not). If your leg is straight, dorsi-flex your right foot/ankle, so that your toes are pointing towards the ceiling (think top of the foot towards your face, sole of the foot away from you). Keeping your torso upright, gently hug the scapula (should blades) in towards the back of the heart, allowing for an open chest.


IF you would like to move towards the full expression of Hanumanasana, wiggle the right foot forward, then tuck the left toes and inch the left leg back behind you, then wiggle the right foot forward and inch the left leg back until you reach your edge. For some, (like me) you will place a block (bolster or rolled blanket) under your sitz bones at a height setting that works for you. Adjust the blocks under your hands, bringing them closer to your hips which will keep your torso more upright. If you have mobility to go deeper, continue until your sitz bones connect with the mat. Very mobile yogis, may fold over the extended front leg for a few breaths and then walk the hands to either side of the hips bringing the torso upright. One may even find hasta bandha, clasping the hands behind the torso or extend both arms skyward in sign of victory! Hold for a few breaths, then return hands to the floor (or blocks).


Coming out of Hanumanasana:
For those who went into the full expression of the pose to come out, may roll to the outside of the right hip, bend the right knee, plant hands forward on the mat, tuck the left toes and step back to adho mukha svanasana (down dog) to release. Then lower knees to the ground for table top and repeat on the left side. For those in ardha hanumanasana, tuck the back (left toes), inch the knee forward a bit, then wiggle the right knee back towards your body a little until the right foot can plant flat on the mat. From low lunge, walk both hands (with blocks) to the left and place the right knee back beneath you into table. You may want to find down dog or work through cat stretch or find pranatasana/balasana child’s pose to release. Then come back to table to complete the other side.
")
Courtney Mollins-Bidlake lives in Fredericton, New Brunswick. She completed the SOYA 300 hr upgrade to 500 hr certification in 2021 and plans to offer the SOYA teacher training programs on the East Coast! Her yoga journey began nearly 20 years ago. A doula and a reflexologist, Courtney specializes mainly in Prenatal Yoga in her private practices along with fun yoga classes and events in her community.
Recent Comments